Sunday, November 30, 2014
Tuesday, November 25, 2014
Bathroom Decor Projects

Here are some quick simple things to make as gifts or for a
craft show. If you like to change the décor
of your bathroom, this is a great way to make seasonal decorations.
I found the FREE PATTERN HERE . I made a number of them, with my own variations,
of course (like I always do!) and donated most of them to my sister-in-law’s
United Way consignment shop, where the sales benefit the Salvation Army and
other programs. I didn’t add the
ribbon. I just left the design open.
The long holders took me two or three nights in front of the
television. The toilet paper cover (back
of the toilet) was finished in a couple of hours. When I say “quick project”, I’m not
kidding. These are so fast and easy to
make.
These extra holders are great for more than just toilet
paper rolls. Hang one by your sink or
close to the shower and store rolled up washcloths or small hand towels.
 |
| Photo compliments of "crochetnmore.com" |
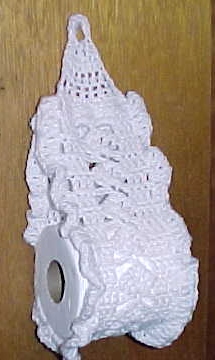
Here is another pattern (CLICK HERE FOR SINGLE ROLL PATTERN) for a single roll
holder, as shown in this pic (this one was not made by me….. it is the ‘model’
in the referenced link.)


 I love the Christmas Set.
The cover on the back of the toilet was yet another one of my “made it up as I go” projects. Basically, I started the project like I would a scarf, using the double crochet stitch. When it was large enough to wrap around a roll of toilet paper, I just connected the two ends together. I crocheted the hat (again, freelancing it) and was happy to find the ‘fuzzy’ trim that I crocheted onto the outer edge for the Santa effect!

I sewed little beads on the white portion of the holder to make the center look like bells.

And of course, living in Indianapolis, I had to do an “Indianapolis
500” race design of black and white!
To hang them I used the removable hangers, as shown here.
Sunday, November 9, 2014
Jacob's Ladder Afghan

This afghan pattern is called “Jacob’s Ladder” and when I
saw a photo of one, I instantly had to find out how to make one. Here is the pattern I used to get me
started: http://www.freewebs.com/bethintx/jacobsladderafghan.htm
I deviated a bit from it as I didn’t
like so many bump-parts of the design. I
wanted those to be the accent of the finished afghan. (If you follow my work at all, you know I
RARELY actually follow a pattern the way it is written. I almost always make my own design changes in
about everything I make!)
This is a blanket for my niece who is expecting her third
child. I felt pretty safe using these
colors because there are no girls in their family. She already has 2 sons and her husband’s
brother is expecting their first baby …. a boy.
Wouldn’t you know it that when I’m over half done with this, she finds
out it is a girl! Oh well. As I tell people, “Girls wear blue all the
time!”

I used one skein of the blue (with lots left over), 4 of the
white and 8 of the multi-color. However …..
I used 2 strands of yarn when crocheting with the multi-color so if you used
just a single you won’t need near as much.
Size “H” crochet hook.
There are some things about the pattern I just love and some
things you have to think about. I love
that I can easily figure out how many beginning stitches to make and still have
the pattern come out right. (Don’t you
just hate it when you have 3 or 4 extra stitches at the end of your first row
because of miscounting or miscalculation?).
The bump part of the design is actually 10 chains that are
twisted together and braided. The
instructions in the pattern were pretty easy to follow.

Knowing that, I was able to easily count my
stitches for length. The wide parts of
my afghan are 30 stitches, so I just counted off 10 for the first solid section
+ 10 for the chain-10-braid + 30 for the next solid section +10 for the
chain-10-braid …….. and so on.
The part you have to think about is the blanket will shrink
in actual size once you do the twisting/braiding part. The chain-10 are about 2-1/2 inches wide but
once they are twisted they are only ½ inch wide. You will lose two inches in width for every
braid in your design.

But spend a few
minutes thinking it through and you will be fine. This is illustrated very well in these two
before-and-after photos of the afghan laid out on the bed. Notice how much extra bed is exposed in the
after-photo.

The "before" measurement was 48 x 58.

The "After" measurement was 48 x 43.
I was concerned the bump in the design would be hard to lay
on but was happily surprised to find it is just as soft as the yarn being
used. No worries after all!
This pattern is very easy, even though it may look a little
complex to beginners. So beginners …..
give this one a try and your family and friends will rave over your expertise
and talent!!
It is about to become my Go-To pattern. I’m planning one where I make the afghan all
one color and the braids a different color.
Can’t wait to see how that turns out!
.
Subscribe to:
Posts (Atom)